Kneading your dough is basically the first phase you go through to get from a bag of flour to a beautiful loaf. What happens in your dough when you knead it?
- You hydrate the flour. Flour will undergo a great transformation once in contact with water.
- Gluten begins to form in your dough, as you just add water to your flour. You don’t even need to knead it, the gluten can form by itself.
- You need to gradually add water to the flour and only add extra water only when the water you added previously has been absorbed by the flour. There’s not much you can do wrong when you’re slowly adding the water. However, if you add it too quickly, you may damage the gluten network quite severely and irreversibly.
How can you knead your dough?
You can choose one of two kneading approaches:
- Manually – which means you use your paws to mix the ingredients. The benefit is that you can have a really good feel of the dough as you progress with kneading and it’s almost impossible to manually over-knead or overheat a manually kneaded dough. Of course, it can be quite physically challenging and messy and it usually takes a much longer time than using a mixer.
- Automatically, by using a mixer. This is a virtually effortless endeavor, but you will need to keep an eye on your dough at all times, as there is a real possibility of dough over-kneading or over-heating. The differences between a good and bad mixer are quite significant and it’s best to purchase a piece of equipment you’ll be able to use for many years instead of going for the cheap options you’ll burn out when you mix your first brioche dough. 😊
What happens if you under-knead your dough?
Your dough won’t have strength, will tear very easily and the gluten network won’t be strong enough to trap gas bubbles inside. You may have a very difficult time trying to shape it and you’ll end up with a loaf that can’t really hold its shape and will have a minor oven spring.
What happens when you over-knead the dough?
Over-kneading, especially at high speeds can lead to dough overheating, which can deteriorate it and it can also cause the delicate wild yeasts in your dough to degrade. The dough will be extremely firm and fight back when you’re trying to fold it. This can also lead to a dough that tears easily, but for the opposite reason, basically your gluten is so well developed that when you try to stretch and fold it, it may be almost impossible to maneuver it. It may lead to a very crumbly bread and a hard crust.
So how do you know your kneading is sufficient?
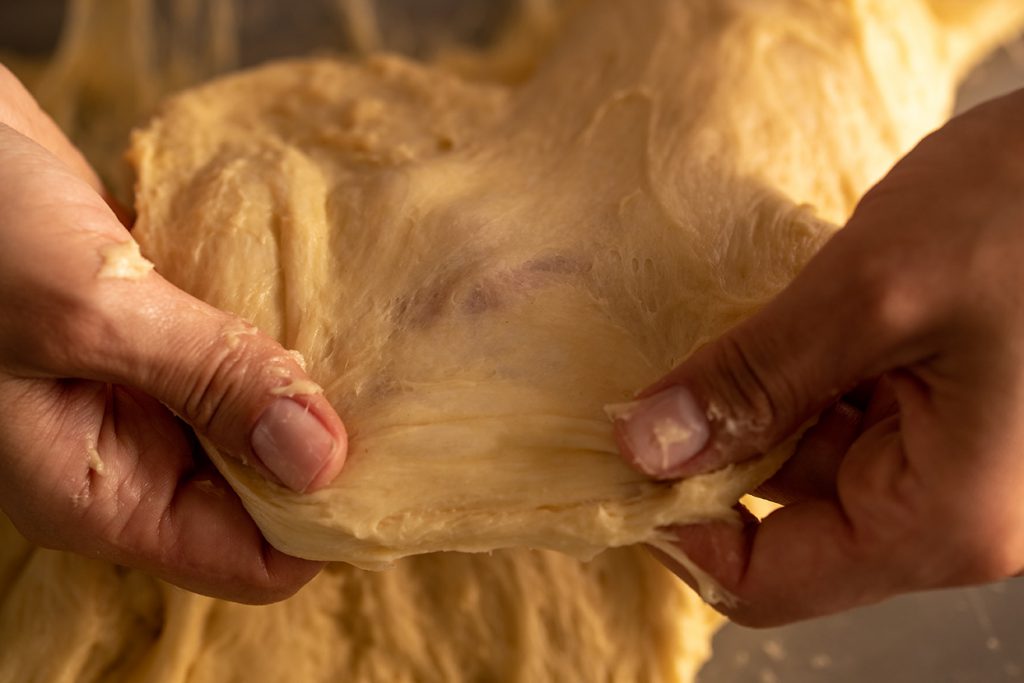
Once your dough is sufficiently kneaded, it will start to come together and you will not see any spots of un-hydrated flour. Its surface should be slightly shiny. You can test your dough with the window pane test – for this, you need to stop kneading, grab a piece of dough and try stretching it in a thin layer between your hands. Your dough should not break easily, you should be able to form a thin layer of dough before the dough eventually breaks. This is called a moderate gluten development.
A well kneaded dough should not break easily, but should also not be extremely firm, it should have both elasticity and extensibility. That is because gluten has two main components:
- Gliadines, which give the dough extensibility
- Glutenins, which give it elasticity.
There are plenty of no-knead recipes out there, where you can rely on gluten development straight in the bulk ferment phase. Whilst there’s nothing wrong with these recipes, we consider a well kneaded dough is superior to a no-knead though and, contrary to popular belief, these recipes actually work best if you’re a seasoned baker who knows how to play with dough fermentation in order to bypass the initial kneading phase.
Autolyse
Autolysis is a phase that can be included in your breadmaking routine and preceds dough kneading and it basically involves mixing flour with water and letting them rest. Autolyse was discovered in 1974 by Professor Raymond Calvel, a French Master Baker during bread experiments. He discovered that the rest period improved the links between starch, gluten and water, as well as notably improved the extensibility of the dough. However, the need for a proper kneading technique is even greater if you decided to first autolyze your dough, as now you need to incorporate the starter, salt and potentially some remaining water into your mix of flour and water.
Of course everything we mention in this article mainly applies to doughs that form gluten networks, mainly wheat doughs. If you aim at getting a great gluten network with rye or some ancient grains (like einkorn, spelt etc.), you may find it next to impossible to do so, because these cereal simply can’t contribute to well developed gluten networks. You can still use other cereal in your wheat doughs, if you aim at improving the flavor profile or fermentation of your dough, but if you aim at beautiful gluten networks in your loaves, your recipe should call for a significant amount of flours that have the ability to form a strong dough (white wheat, preferably strong bread flours, kamut, semolina etc.).
Happy baking!